Looking to jump on the latest coffin nail trend? Well, look no further! In this article, we will show you how to create stylish red acrylic nails. Whether you are a beginner or an experienced nail technician, we have tips and ideas for you. So get ready to learn how to create trendy red coffin nails with ease!
How to create a coffin nail shape?
There are 3 ways to create that coffin nail shape: acrylic, gel and just purchasing a set of coffin nail tips and attaching them to your nails. We will provide instructions for each of these 3 methods to make sure everyone will find the best technique for their skills and expectations.
 | iBeautying
Red press-on acrylic coffin nails with glossy finish [Medium length] Colors: red, glossy finish 100+ Ratings | |
Allkem
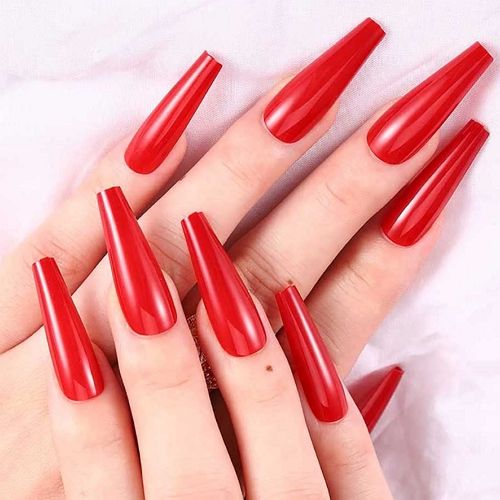
Long acrylic baddie coffin nails with transparent elements [Extra long] Colors: red, transparent 1.900+ Ratings | ||
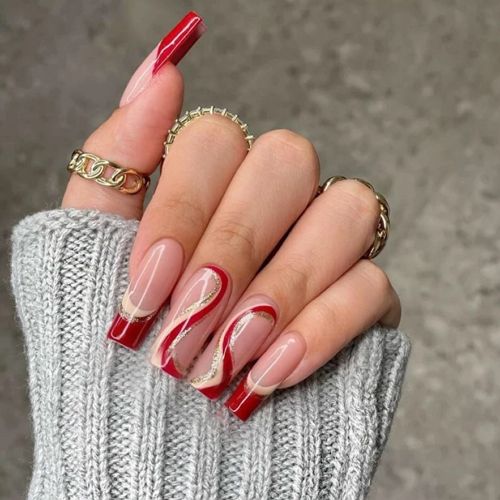
 | YOSOMK Long acrylic baddie coffin nails in classic red with extra glossy finish [Long] Colors: red, glossy finish | |
 | Obmyec
Press-on acrylic coffin nails with red french tips [Long] Colors: red, dark red 10+ Ratings | |
 | Vivilly
Press-on red matte baddie coffin nails [Long] Colors: red, matte finish 20+ Ratings |
Creating acrylic coffin nails
If you are looking for a long-lasting and sturdy nail design, then acrylic coffin nails are the way to go! To create them, you will need:
- acrylic powder;
- acrylic liquid;
- nail brush;
- nail file.
- First, start by filing your nails into the desired shape. Coffin baddie nails, in fact, are way easier to work with, than it may seem right away.
- Next, use the nail brush to apply a thin layer of acrylic liquid to your entire nail.
- Once that is done, dip the brush into the powder and apply it over the wet acrylic. Make sure to evenly distribute the powder and avoid any clumps.
- Repeat this process until you have achieved the desired thickness and opacity.
- Finally, use the file to even out your nails and make sure they are all uniform in shape.
How to create gel coffin nails
Gel coffin nails are a great option if you want something that looks more natural than acrylics but is still durable and long-lasting. To create gel coffin nails, you will need:
- gel polish;
- UV or LED lamp;
- nail file.
- First, start by filing your nails into the desired shape.
- Next, apply a thin layer of gel polish to your entire nail.
- Once that is done, cure your nails under the UV or LED lamp for the recommended amount of time (usually around 60 seconds).
- Repeat this process until you have achieved the desired thickness and opacity.
- Finally, use the file to even out your nails and make sure they are all uniform in shape.
Using square tips and glue for creating DIY coffin nails at home
If you are looking for a quick and easy way to create coffin nails, then using tips is the way to go! To create this type of nail, you will need:
- nail tips;
- nail glue;
- nail file.
- First, start by filing your nails into the desired shape.
- Next, use nail glue to attach the tips to your nails.
- Once that is done, use the file to even out your nails and make sure they are all uniform in shape.
- Finally, apply a thin layer of gel polish or regular polish to your nails and you’re done!
How to color coffin nails red
There are many ways to achieve that trendy red color on your nails. You can use regular polish, gel polish, or even acrylic powder. If you want to use regular polish, we recommend using a base coat and top coat for extra durability. For gel polish, you will need a UV or LED lamp to cure the color. And for acrylic powder, you will need acrylic liquid and a nail brush.

First, start by filing your nails into the desired shape. Next, apply a thin layer of your chosen product to your entire nail. Once that is done, cure your nails under the UV or LED lamp for the recommended amount of time (usually around 60 seconds). Repeat this process until you have achieved the desired opacity. Finally, use the file to even out your nails and make sure they are all uniform in shape. By the way, the same process works will all colors, including matte black, royal blue, sage green, etc. Just make sure to apply the polish with a thin layer and let it dry.
And there you have it! These are just a few ideas for creating trendy red coffin nails. We hope you found this guide helpful and that you will be able to create the perfect nails for your next event! Thanks for reading!
Meet our Expert
 Elaine Andrews is a professional nail technician with 12+ years of experience. She works both with gel and acrylic nails and creates artistic nail designs for her customers. She has been training nail technicians for over 6 years and is an author of her own patented nail courses. Feel free to use the comment field below to ask Elaine something you wanted to know about nails and manicures!