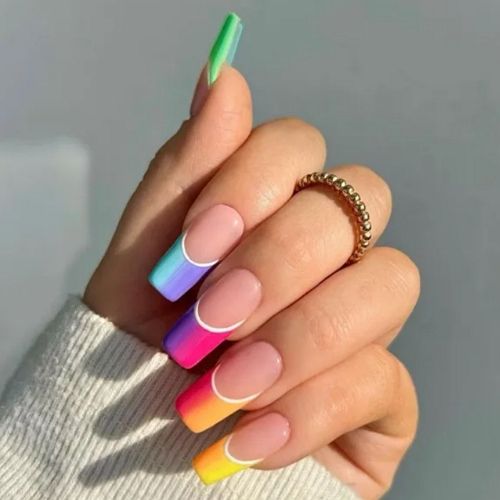
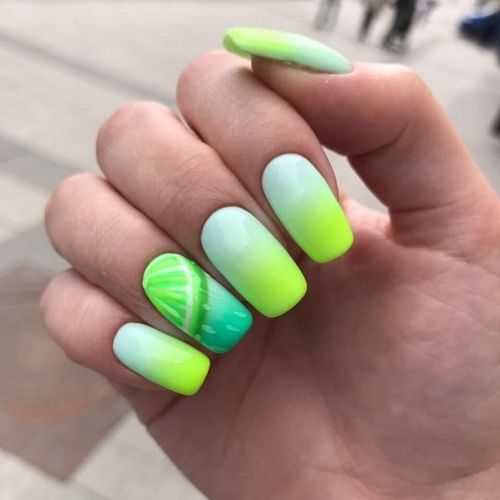
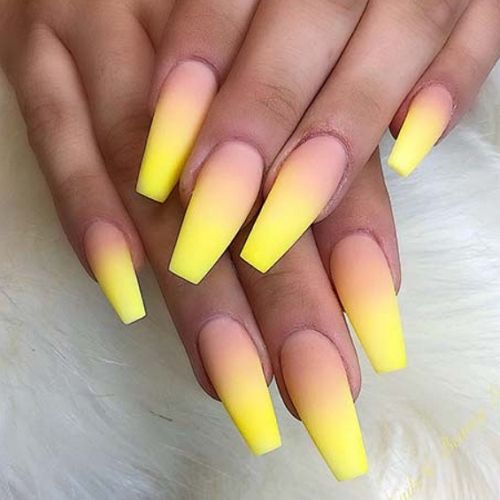
Summer is in full swing, and that means it’s time to show off your brightest nails! Ombre nails are a popular trend right now, and for good reason – they are fun and easy to create. In this article, we will show you some of the best ideas for bright summer ombre nails. We will also provide professional tips on how to create this nail design. So whether you are a beginner or an experienced nail artist, you will be able to create beautiful ombre nails this summer!
Featured colors for bright summer ombre nails
When it comes to ombre nails, the sky is the limit when it comes to colors. You can use any colors you like, but we recommend using bright and bold colors for summer. Here are some of our favorite color combinations:
- Pink and purple
- Orange and yellow
- Green and blue
- Red and pink
 | EchiQ Bright summer ombre press-on coffin nails in moderate pastel colors [Long] Colors: yellow, blue, green, orange, nude pink 160+ Ratings | |
 | Foccna Long colorful ombre nails with abstract French tips [Long] Colors: nude beige, blue, purple, pink, orange, yellow 350+ Ratings | |
 | Misssix Long acrylic press-on nails with bright summer ombre design [Long] Colors: pink, yellow, nude beige, green, blue, orange 1.200+ Ratings | |
 | CoolNail Long acrylic press-on nails in vibrant summer colors with ombre design [Long] Colors: light pink, orange, yellow, purple 200+ Ratings | |
 | YoYee Bright summer nails with French tips in vibrant colors [Long] Colors: pink, gold, blue, yellow, orange, nude pink 2.000+ Ratings |
These are just a few examples – you can really use any colors you like! Just make sure to use bright and bold colors that will stand out in the summer sun.
Now that you have an idea of what colors to use, let’s get started with the tutorial!
Materials needed for ombre nail designs
- Nail polish in two or more colors
- A makeup sponge
- Nail polish remover
- Cotton balls or pads
- Top coat (optional)
Now that you have gathered your materials, let’s get started!
Creating bright ombre nails: step-by-step instruction
Creating the perfect ombre nails is easier than you might think. In this section, we will show you how to create beautiful ombre nails step-by-step. We will also provide some professional tips that will help you create perfect nails every time. So whether you are a beginner or an experienced nail artist, be sure to follow these instructions for beautiful summer ombre nails!
Step One: Prep your nails
The first step is to prep your nails for the design. This means giving them a good cleaning and trimming them to the desired length. You will also want to remove any old nail polish or debris from your nails.
Once your nails are clean and trimmed, it’s time to move on to the next step!
Step Two: Apply a base coat
Now that your nails are prepped, it’s time to apply a base coat. This will help your nail color last longer and prevent any staining. Be sure to let the base coat dry completely before moving on to the next step!
Step Three: Choose your colors
Now it’s time to choose your colors! Remember, you can use any colors you like. But we recommend using bright and bold colors for summer. Once you have chosen your colors, it’s time to move on to the next step!
Step Four: Apply your nail color
Now that you have chosen your colors, it’s time to apply your nail color. Start with one hand and apply a thin layer of each color. Be sure to let each layer dry completely before moving on to the next color.
Once you have applied all of the colors, it’s time to move on to the next step!
Step Five: Apply a top coat
The final step is to apply a top coat. This will help seal your design and give it a glossy finish. Be sure to let the top coat dry completely before enjoying your beautiful summer ombre nails!
And that’s it! You have now learned how to create beautiful summer ombre nails. Here are other colors and designs that are trendy this year: lavender ombre, brown ombre nails, black ombre nails, etc. We hope you enjoyed this tutorial and that you find these tips helpful.
What other design elements look great with bright summer ombre nails?
There are endless possibilities when it comes to nail art. But if you want to keep your nails looking chic and summery, we recommend adding some simple design elements to your ombre nails. Here are some of our favorite ideas:
- Flowers;
- Stars;
- Hearts;
- Polka dots.
These are just a few examples – you can really get creative with your nail art! Just make sure to keep it summery and bright.
We hope you enjoyed this article on bright summer ombre nails! Be sure to check out our other articles for more great tips and tutorials.
Meet our Expert
 Elaine Andrews is a professional nail technician with 12+ years of experience. She works both with gel and acrylic nails and creates artistic nail designs for her customers. She has been training nail technicians for over 6 years and is an author of her own patented nail courses. Feel free to use the comment field below to ask Elaine something you wanted to know about nails and manicures!